

Hiring your first team member is one of the most exciting, and nerve-wracking, moments in business.
You know you need help.
You’re maxed out. You’re juggling clients, marketing, operations, and admin. You also know one wrong hire could cost you time, money, and momentum you worked hard to build.
And then you sit down to write the job description… and everything gets fuzzy.
- “What do I actually need?”
- “What if I ask for the wrong things?”
- “What if I hire someone who interviews well but underperforms?”
Here’s the truth:
Most first hires go wrong because the job description is vague.
Not because you’re a bad leader.
Not because the candidate tricked you.
But because the role was written like a wish list instead of a performance blueprint.
This guide will walk you step-by-step through writing a job description that:
- Attracts the right candidates
- Filters out weak fits early
- Protects you from emotional hiring decisions
- Sets your first team member up to succeed
And most importantly — we’re going to do it using competencies.
Because performance doesn’t come from résumé shine. It comes from job fit.
In fact, the classic Harvard Business Review study Job Matching for Better Sales Performance found that when people are matched to the actual demands of a job, rather than hired based on surface traits, performance improves dramatically. That same principle applies to your first hire.
You’re not hiring a résumé.
You’re hiring a performance pattern.
Step 1: Name the Role Based on Outcome, Not Vibe
First-time founders often write titles like:
❌ “Right-Hand Rockstar”
❌ “Unicorn VA”
❌ “Jack of All Trades”
These sound fun… but they don’t communicate clarity.
Instead, name the role based on what it owns.
✅ Operations & Admin Assistant
✅ Client Experience Coordinator
✅ Marketing & Content Assistant
✅ Executive Assistant (Founder Support)
If you can’t explain what the role does in one sentence, candidates can’t either.
Step 2: Write a 1-Sentence “Why This Role Exists”
This prevents the role from becoming “help with everything.”
Use this template:
This role exists to ______ so that the founder can ______.
Examples:
- This role exists to manage day-to-day operations so the founder can focus on revenue-generating activities.
- This role exists to support client onboarding and communication so clients feel cared for and retention stays high.
- This role exists to execute weekly content and marketing systems so the founder stays visible without burning out.
If you can’t clearly define why the role exists, you’re not ready to hire yet.
Step 3: Choose the Lane — Support or Growth
Most first hires fail because the founder hires for growth when they actually need stabilization.
Support Role = Protects your time
- Inbox
- Scheduling
- Admin
- Systems
- Client onboarding
Growth Role = Expands revenue
- Marketing execution
- Content
- Lead follow-up
- Sales support
Pick one primary lane.
❌ Don’t hire someone to “do ops + marketing + sales + systems + design.”
✅ Do hire someone to fully own one category.
Clarity increases performance.
Step 4: Turn Your Overwhelm Into 3–7 Core Responsibilities
Open your calendar and task list.
Ask:
- What drains me weekly?
- What do I procrastinate?
- What creates bottlenecks?
Group those tasks into buckets.
Instead of writing:
❌ “Help with client stuff.”
Write:
✅ Client Onboarding & Communication
- Send onboarding emails
- Track intake forms
- Confirm appointments
- Follow up on missing documents
Specific responsibilities reduce confusion later.
Step 5: Use O*NET to Validate Your Job Description
If you’ve never hired before, one of the hardest parts of writing a job description is knowing whether the role you’ve designed actually reflects the work required.
Many first-time founders either:
- Underestimate what the role involves
- Combine too many roles into one job
- Or forget key responsibilities that matter for performance
This is where a free resource called O*NET OnLine can help.
O*NET OnLine is a public occupational database developed for the U.S. Department of Labor. It compiles research on thousands of jobs and includes detailed information about:
- Tasks
- Work activities
- Work environment
- Skills and abilities
- Work styles and behavioral patterns
Instead of guessing what an Operations Assistant, Executive Assistant, or Marketing Coordinator should do, you can use O*NET to see how those roles are typically structured across real workplaces.
For first-time hirers, this helps you:
- Sanity-check your job responsibilities
- Avoid creating unrealistic “everything roles”
- Understand what the work actually looks like day-to-day
- Identify competencies that predict success in the role
Think of O*NET as research input that helps you refine your job description before you hire.
1. Find the Closest Matching Occupation
Go to O*NET OnLine and search for a job title that closely matches the role you’re hiring for.
Examples:
- Executive Administrative Assistant
- Office Manager
- Operations Assistant
- Marketing Coordinator
Each occupation page becomes a baseline reference for the role.
Tip: Many founders combine two functions in their first hire (for example operations + marketing). If that’s the case, review two occupations and pull the most relevant responsibilities from each.
Your goal is still to keep your final job description focused on 3–7 responsibility areas.
2. Pull Tasks to Build Your Core Responsibilities
Every O*NET occupation page includes a Tasks section listing real duties performed in that role.
What to do:
1. Copy the top 8–12 tasks that match your business needs
2. Rewrite them using your tools and language
3. Consolidate them into 3–7 responsibility categories
Example:
O*NET task:
“Prepare correspondence, reports, or presentations.”
Founder-friendly rewrite:
Manage internal documentation and reporting
- Prepare internal reports
- Maintain project updates
- Update shared documentation
This helps ensure your job description reflects real work patterns, not guesswork.
3. Use Work Activities to Describe What the Job Actually Involves
O*NET also lists Work Activities, which describe the type of work performed day-to-day.
Examples include:
- Coordinating with others
- Organizing information
- Planning and prioritizing work
- Handling customer concerns
You can translate these into expectations inside your job description.
Example:
Instead of writing:
❌ “Must be organized.”
Write:
✅ “Plans and prioritizes weekly tasks and keeps systems updated consistently.”
4. Use Work Context to Describe the Work Environment
One of the most overlooked sections of founder-written job descriptions is describing what the work environment is actually like.
O*NET includes a Work Context section describing things like:
- Pace of work
- Frequency of interruptions
- Level of communication with others
- Attention to detail requirements
You can translate this into a short “Work Environment” section.
Example:
Work Environment
- High volume of messages and requests
- Frequent context switching between tasks
- Daily communication with clients or vendors
- Requires sustained attention to detail
This helps candidates self-select, which prevents hiring surprises later.
5. Use Skills, Abilities, and Work Styles to Inform Your Competencies
O*NET also includes rated descriptors across:
- Skills
- Abilities
- Work Styles
These can help you identify the competencies that matter most in the role.
For example:
O*NET Work Style → Attention to Detail
Competency translation:
Strong pattern
- Catches small mistakes before they create problems
- Maintains accurate documentation and systems
Weak pattern
- Misses inconsistencies
- Leaves tasks incomplete
Using O*NET this way allows you to combine research-backed role design with competency-based hiring, which is what ultimately drives performance.
Step 6: Define 30/60/90 Day Success Outcomes
This is where your job description becomes powerful.
Instead of vague expectations, define observable results.
Example: Operations Assistant
30 Days
- Inbox triage system is running
- Weekly task board organized
- Calendar conflicts reduced
60 Days
- 3 core SOPs documented
- Admin workload reduced by 30%
90 Days
- All recurring tasks automated or systemized
- Founder has weekly visibility dashboard
❌ Don’t write: “Must be dependable.”
✅ Do write: “Inbox cleared to zero by end of each business day.”
Outcomes reduce emotional decision-making.
Step 7: Identify the Competencies That Predict Success
This is the section most founders skip.
And it’s the section that protects you from a bad hire.
What a Competency Actually Is
A competency is not:
- A personality label
- A vibe
- A software skill
- A degree or education
A competency is a consistent performance pattern involving:
- Cognitive ability (how someone processes information)
- Behavioral tendencies (how they act under pressure)
- Learning style (how quickly they adapt)
- Motivation (what drives them)
- Interpersonal style (how they relate to others)
Skills can be taught, but performance patterns show up every day. That’s why matching competencies to job demands matters.
Step 7A: Diagnose Before You Choose Competencies
Before picking competencies, ask:
1. Where have I struggled most?
2. What frustrates me about this work?
3. When someone fails in this role, why will it happen?
Examples:
If you say:
- “Things fall through the cracks.”
- “I forget details.”
- “Tasks stall.”
You need:
- Detail orientation
- Follow-through
- Prioritization
If you say:
- “Clients overwhelm me.”
- “I avoid hard conversations.”
You need:
- Emotional steadiness
- Communication strength
- Boundary clarity
Your frustration reveals your required competencies.
Step 7B: Define Competencies With “Strong vs Weak” Patterns
This is critical.
Example: Follow-Through
Strong pattern:
- Sends updates before being asked
- Finishes tasks completely
- Flags delays early
Weak pattern:
- Needs reminders
- Leaves tasks 80% done
- Avoids uncomfortable updates
Example: Prioritization
Strong pattern:
- Identifies top 3 revenue-protecting tasks
- Asks clarifying questions early
Weak pattern:
- Works on easy tasks first, even if not essential
- Gets overwhelmed and freezes
Example: Emotional Steadiness
Strong pattern:
- Calm with client issues
- Doesn’t take feedback personally
Weak pattern:
- Defensive
- Avoids difficult conversations
Now your job description becomes a filter.
Step 8: Translate Competencies Into Real Expectations
Don’t say:
❌ “Must be detail-oriented.”
Say:
✅ “You catch small mistakes before they impact clients and flag inconsistencies immediately.”
Don’t say:
❌ “Must thrive in fast-paced environment.”
Say:
✅ “Plans change quickly here. You can pivot tools, timelines, and priorities without shutting down.”
Clarity attracts aligned candidates.
Step 9: Add a “You Will / You Will Not” Section
This filters dramatically.
You Will:
- Track tasks daily
- Communicate proactively
- Ask when unclear
You Will Not:
- Guess silently
- Let tasks sit until they become urgent
- Wait to be reminded
This protects you from passive hires.
Step 10: Add Tools + Work Rhythm
Be specific:
- We use Slack daily.
- We update tasks in Asana.
- We meet weekly for 20 minutes.
- We document processes as we go.
Specificity increases confidence on both sides.
Step 11: Test for Competencies in the Application
Instead of:
❌ “Why do you want this job?”
Ask:
- “Tell me about a time you managed competing deadlines.”
- “What do you do when you realize you misunderstood instructions?”
- “Describe a system you improved.”
Listen for:
- Ownership
- Process thinking
- Emotional steadiness
- Specific examples
Vague answers = weak signals.
Final candidates should complete a short competency assessment customized to your job description. At Hiring Indicators we create ones based on 50+ years of workplace proficiency data.
Your Job Description Is a Risk-Reduction Tool
When you define:
- Clear outcomes
- Focused responsibilities
- Performance-based competencies
You stop hiring based on urgency or likability. You start hiring based on fit.
And fit drives performance, not guesswork.
Your first hire should create leverage, not stress.
Clarity is what makes that possible.
Your Job Description Is Step 1. Here’s the Whole Playbook.
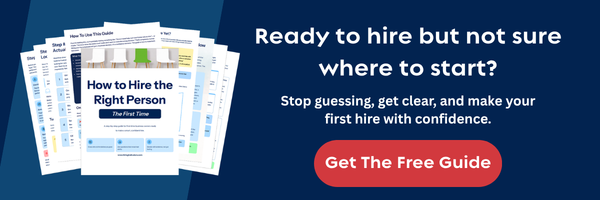
Writing the job description is the most important part — and you’ve nailed it. But the next steps (filtering, interviewing, deciding) are where most founders still get tripped up. How to Hire the Right Person — The First Time picks up where this article leaves off.
Inside:
- The 6 most common first-hire mistakes (and how to dodge each one)
- Behavioral interview questions paired with what strong vs. weak answers sound like
- An evidence checklist for evaluating candidates after the interview
- The pre-offer gut-check before you commit
Related Posts
Make More Money With Your Online Business By Hiring The Right First Employee
Why Smart Small Business Owners Keep Losing Good Employees (And How to Fix It)
The #1 Quality to Look for When Hiring Your First Employee (Hint: It’s Not Experience)
The Skills That Actually Matter When Hiring Your First Salesperson